Deploying Your First Laravel Application: Server Setup
Learn how to deploy your first Laravel application step-by-step using Laravel Forge and Envoyer. This comprehensive guide will walk you through setting up the server, connecting with Envoyer, managing environments, and deploying your application.

Deploying a Laravel application is a crucial step in bringing your project to the world. In this comprehensive step-by-step guide, I'll walk you through the process of setting up your server using two powerful tools, Laravel Forge and Envoyer. By following this guide, you will gain the necessary knowledge and skills to successfully deploy your Laravel application with ease.
In my previous article, "Deploying Your First Laravel Application: Tools and Services", we explored the essential tools and services for releasing your Laravel application to the world. Now, let's dive into the next step: setting up the server with Laravel forge and Envoyer.
To begin, create an account on both services and choose the plan that best suits your needs. For a smooth start, I recommend selecting the basic plans on both platforms. Now, let's dive into setting up Laravel Forge
Setting up the Server with Laravel Forge
Laravel Forge offers features such as server provisioning, automated deployment, SSL certificate management, server monitoring, and database management. It makes setting up and deploying Laravel applications a breeze.
To begin, let's setup a new server provider.
Server Provider Setup
In your Laravel Forge account, first, you need to add a new Server Provider. Laravel Forge supports DigitalOcean, Akamai (Linode), Amazon, Vultr, and Hetzner Cloud. It also supports custom Virtual Private Servers (VPS) in case you want to use another provider, or host it on your own.
In my case, I'm going to select DigitalOcean. Now, go to the Server Provider Settings Page and select DigitalOcean from the list.
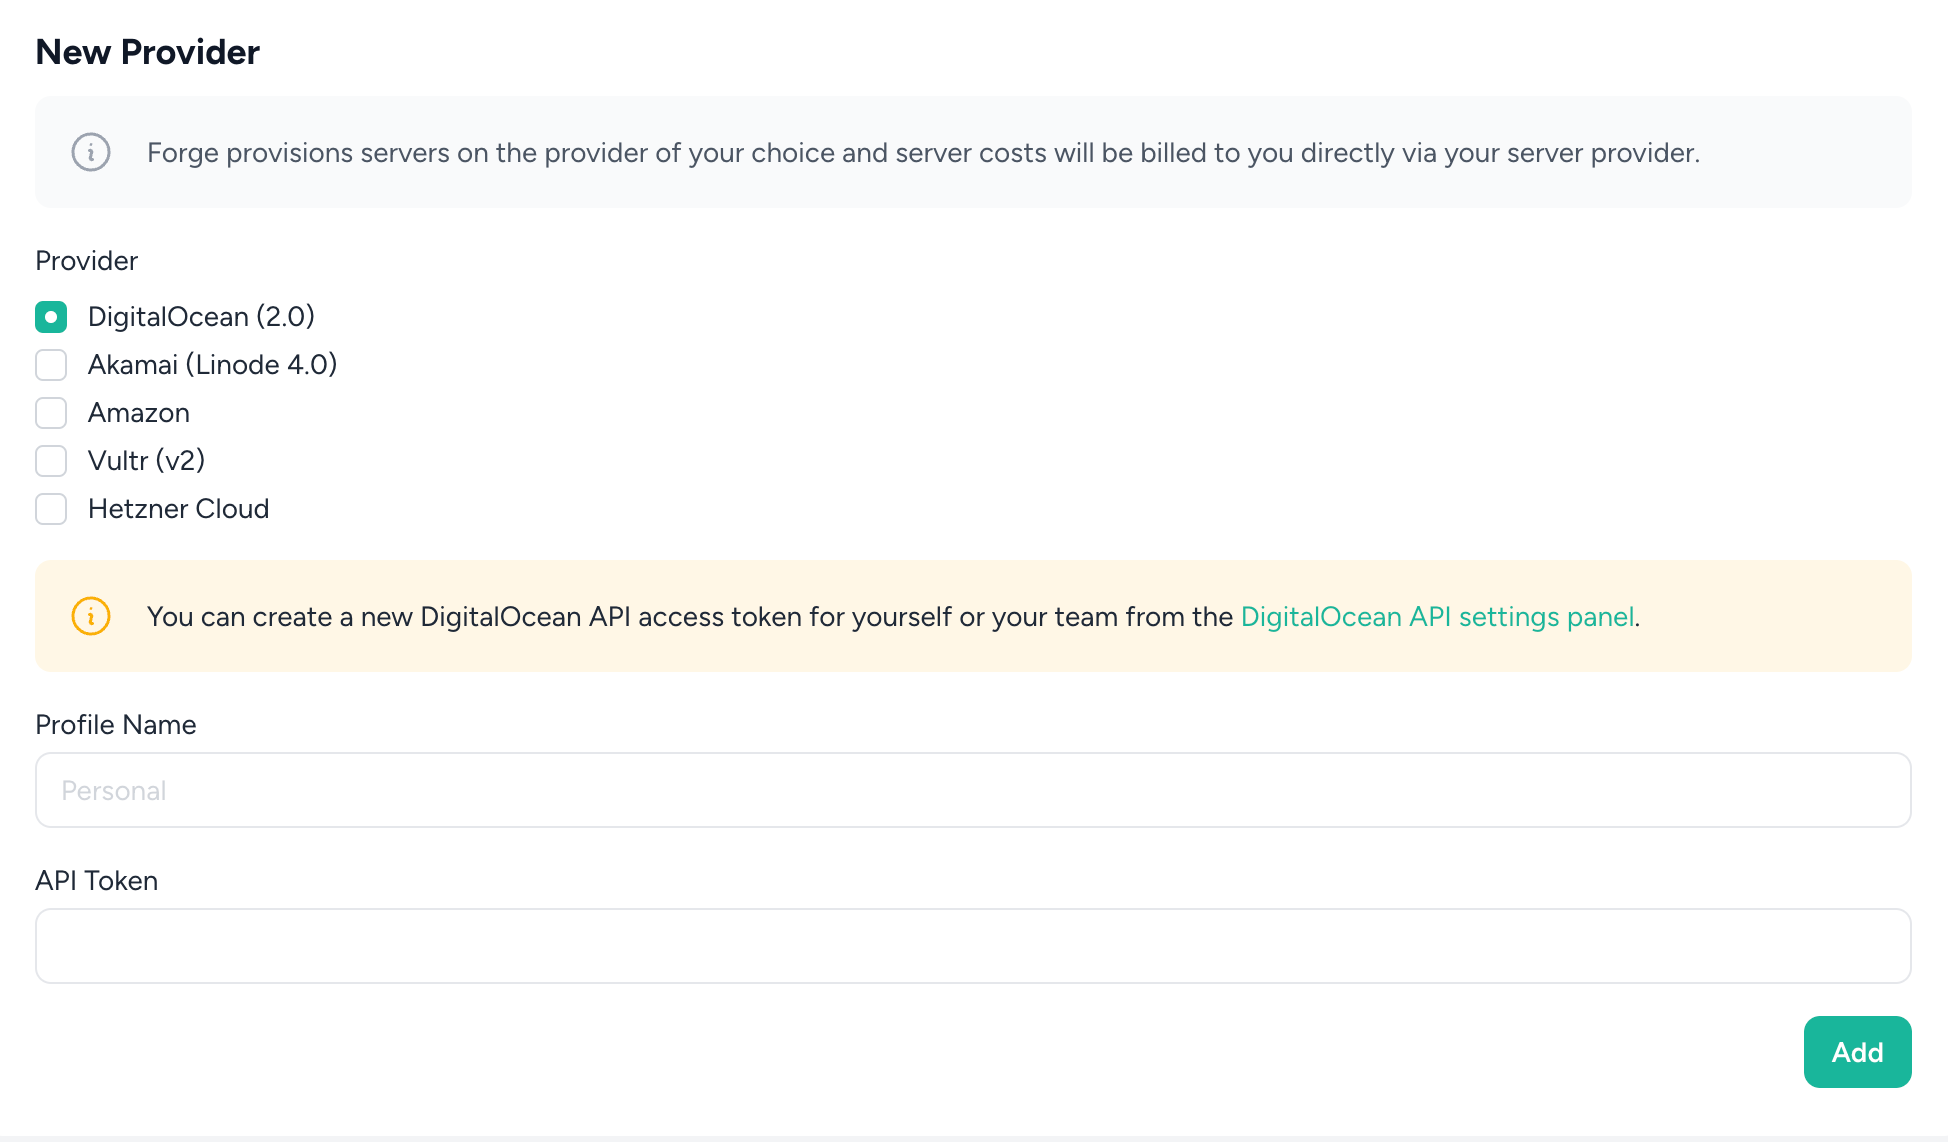
As you can see in the image above, you need to create a new DigitalOcean API access token from the DigitalOcean API Settings Panel.
If you don't have a DigitalOcean account, you can create a new one here.
Under "Tokens" tab, click on "Generate New Token" button, and then fill out the form like in the image below:
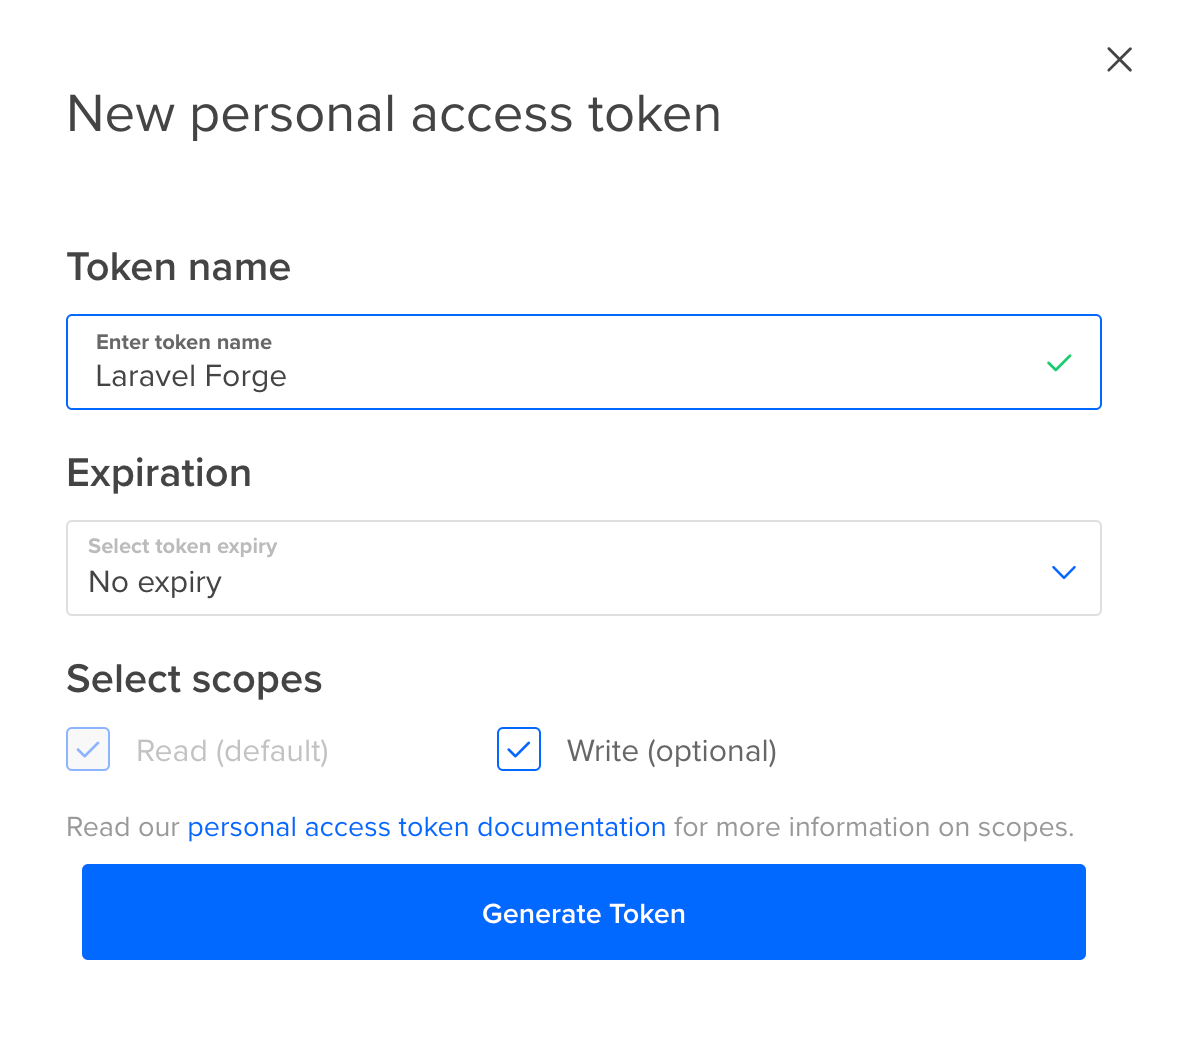
- I recommend you to set the Expiration to
No expirybecause you'll probably use it in the future to create more servers from Laravel Forge. - Also, be sure you select both Read and Write scopes, so Laravel Forge is able to create the server.
Click on "Generate Token" button to get the API token. Come back to Laravel Forge's Server Provider Settings Page , set a profile name, and use the API token you got from DigitalOcean. Pretty easy, right?
Now we can create the server for our application from Laravel Forge. Let's do it!
Creating a New Application Server On Laravel Forge
From the main panel on Laravel Forge, click on "Create Server" button, and then select the DigitalOcean as the server provide. You'll see a form like in the image below:
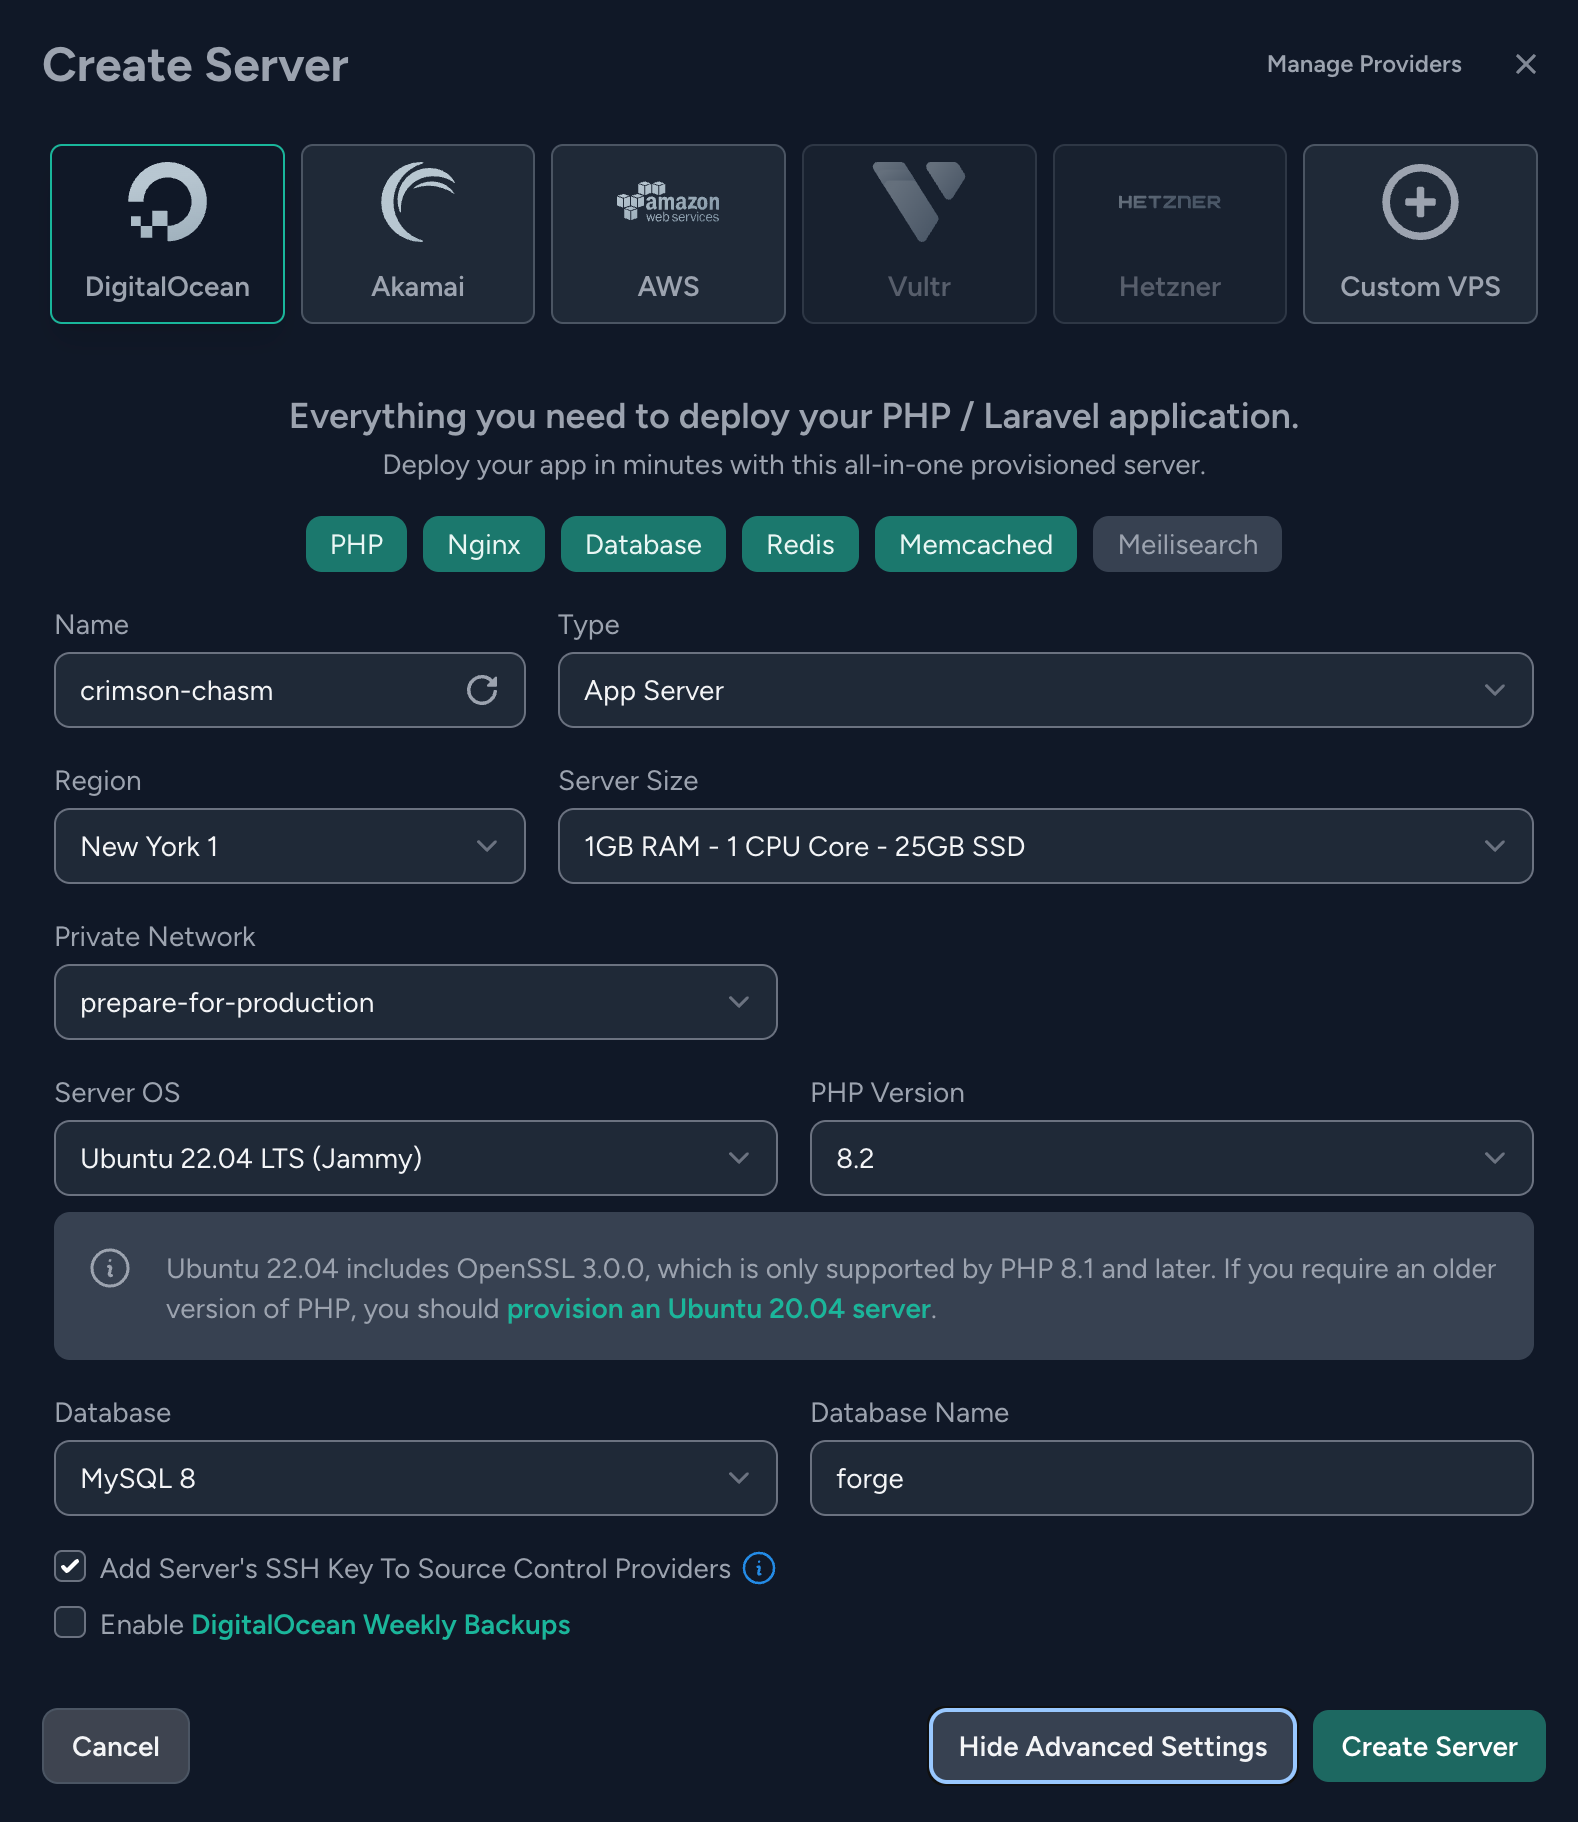
Click on "Advanced Settings" button to see all the possible settings like in the image above.
It might be overwhelming to see all these settings at first. But, don't worry! We'll take a look one by one together.
Name
When naming your server, it's essential to choose a name that allows for easy identification on both Laravel Forge and DigitalOcean. Consider including the name of the environment to distinguish it, especially if you have multiple environments. For example, you could name it "my-app-production" to indicate that it's the production environment for your application.
Type
Here, you indicate the type of server you want. There are multiple options, so, let's take a look at them one by one:
- App Server: Is prepared with all the things you need to host your PHP / Laravel application. This option has PHP, Nginx, Database, Redis, and Memcached installed by default.
- Web Server: This is a simpler option, it comes with just PHP and Nginx, and it's meant to be connected with dedicated cache or database services.
- Worker Server: Worker Server: This option includes the installation of PHP and is designed to handle your application's queued jobs. It is particularly beneficial when you have multiple background processes running and want to avoid overloading your main application server. But, It's also fine to process your jobs in the application server. It all depends on how many requests and background processes your application has to handle.
- Database: As the name implies, this is just for hosting your database, it is a great option in case you want to separate your database from the application server, but you don't want to pay for a dedicated service like PlanetScale.
- Cache Server: By selecting this option, you are only installing Redis and Memcached, used as a dedicated cache.
- Meilisearch Server: This is a custom server just for running Meilisearch. Meilisearch is a search API that allows you to implement a search engine on your website. It's open source, really fast, and very easy to set up.
- Load Balancer: This option only installs Nginx, and it's meant for handling and distributing incoming requests to your application servers. It is a very nice option when you want to scale your application horizontally by adding more application servers.
In our case, it's recommended to select the Web Server option. This selection is ideal because it focuses on running your Laravel application and allows you to leverage the additional services discussed in the article Deploying Your First Laravel Application: Tools and Services.
Region
When choosing the server region, it's important to consider the location of your users. Aim to select the region that is closest to your target audience. By choosing the closest region, you can ensure that your server responds quickly to incoming user requests, resulting in improved performance and user experience.
Consider the geographical distribution of your user base and select the region that minimizes latency and network delays. This approach helps in reducing the time it takes for data to travel between the server and the users, resulting in faster response times.
Server Size
This is a list of the available options you have to host your application. On Deploying Your First Laravel Application: Tools and Services I recommended at least 2 virtual CPUs and 2 GB of RAM.
These resource recommendations are generally sufficient for getting started with your Laravel application. However, depending on the specific requirements and workload of your application, you may need to adjust these resources accordingly.
Private Network (VPC)
This option creates a secure network that facilitates communication between your resources using private IP addresses. It ensures that the communication within the VPC remains protected and isolated from external networks. However, when accessing resources outside the VPC, public network IP addresses must be used.
Setting up a VPC is advantageous for your application because it allows for enhanced security and organization. By defining a VPC, you can easily add additional components such as databases, caches, or load balancers in the future. These resources can be added to the same VPC, enabling seamless communication between servers using private IPs.
Server OS
Here, you define the operating system (OS). Ubuntu is often used to host web applications, and Laravel Forge provides you the long term support version (LTS).
PHP Version
Here, you define the PHP version your application uses. While the decision depends on your specific case, it is recommended to use the latest stable version available that is supported by your application.
Additional Options
There are two additional options:
- Add Server's SSH Key To Source Control Providers: When you enable this option, the SSH key of the server is automatically added to your source control provider once the server is provisioned. This allows the server to clone any repository that your source control account has access to. From a security perspective, it is generally recommended to grant access only to the resources that are truly necessary. By doing so, in the event of a security breach, the impact can be minimized. If you choose not to select this option, you can use site-level deploy keys to grant access to specific repositories that you want to connect to. For more detailed information, please refer to the Laravel Forge documentation.
- Enable DigitalOcean Weekly Backups: DigitalOcean has a nice feature that allows you to create weekly backups of your server. So, in case you have an incident, you can restore the server from a previous snapshot. Keep in mind that it has some additional cost. Check DigitalOcean documentation for more information.
Final selection
Now we have seen all the available options, this is how it looks like when you select DigitalOcean as the provider, and Web Server as the type.
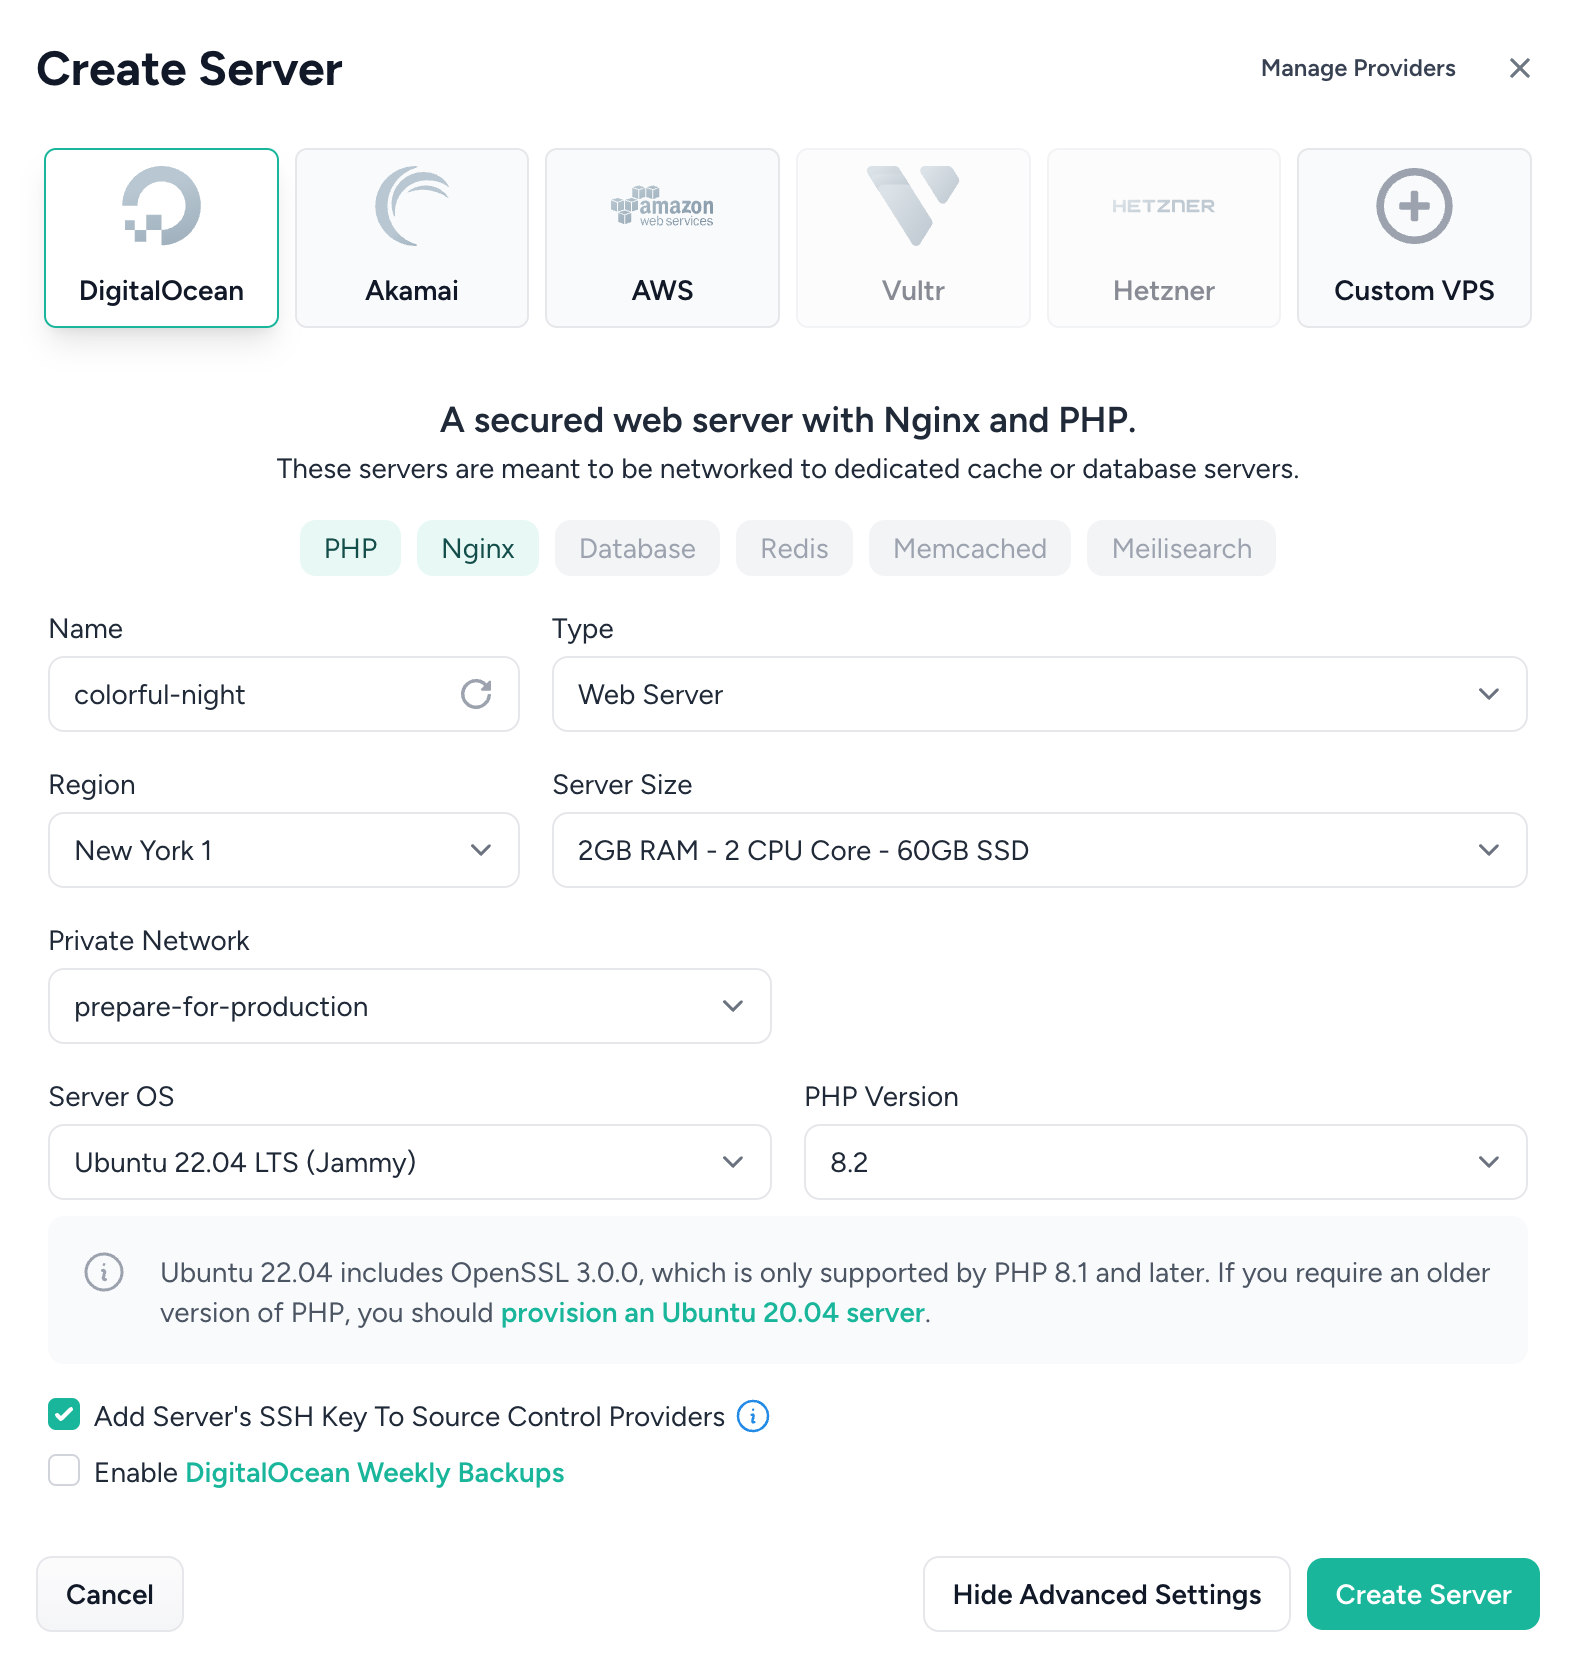
Click on "Create Server" and let's keep going!
Server Provisioning
You will be redirected to a “Provisioning” page, and you will see a popup with the server credentials.
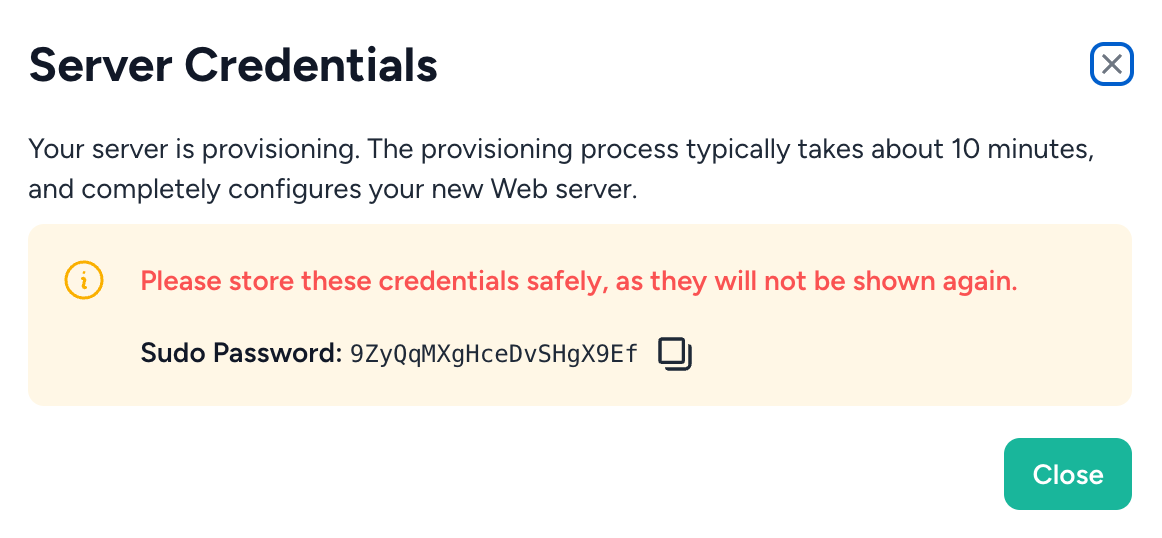
Don't worry if you accidentally close the popup window! Laravel Forge will email you with these credentials once the server is provisioned.
When closing the popup window, you can see the progress of the server provisioning.
It's going to take some minutes to finish. So, maybe it's good time to get some stretch 🧘♂️ or a nice coffee ☕.
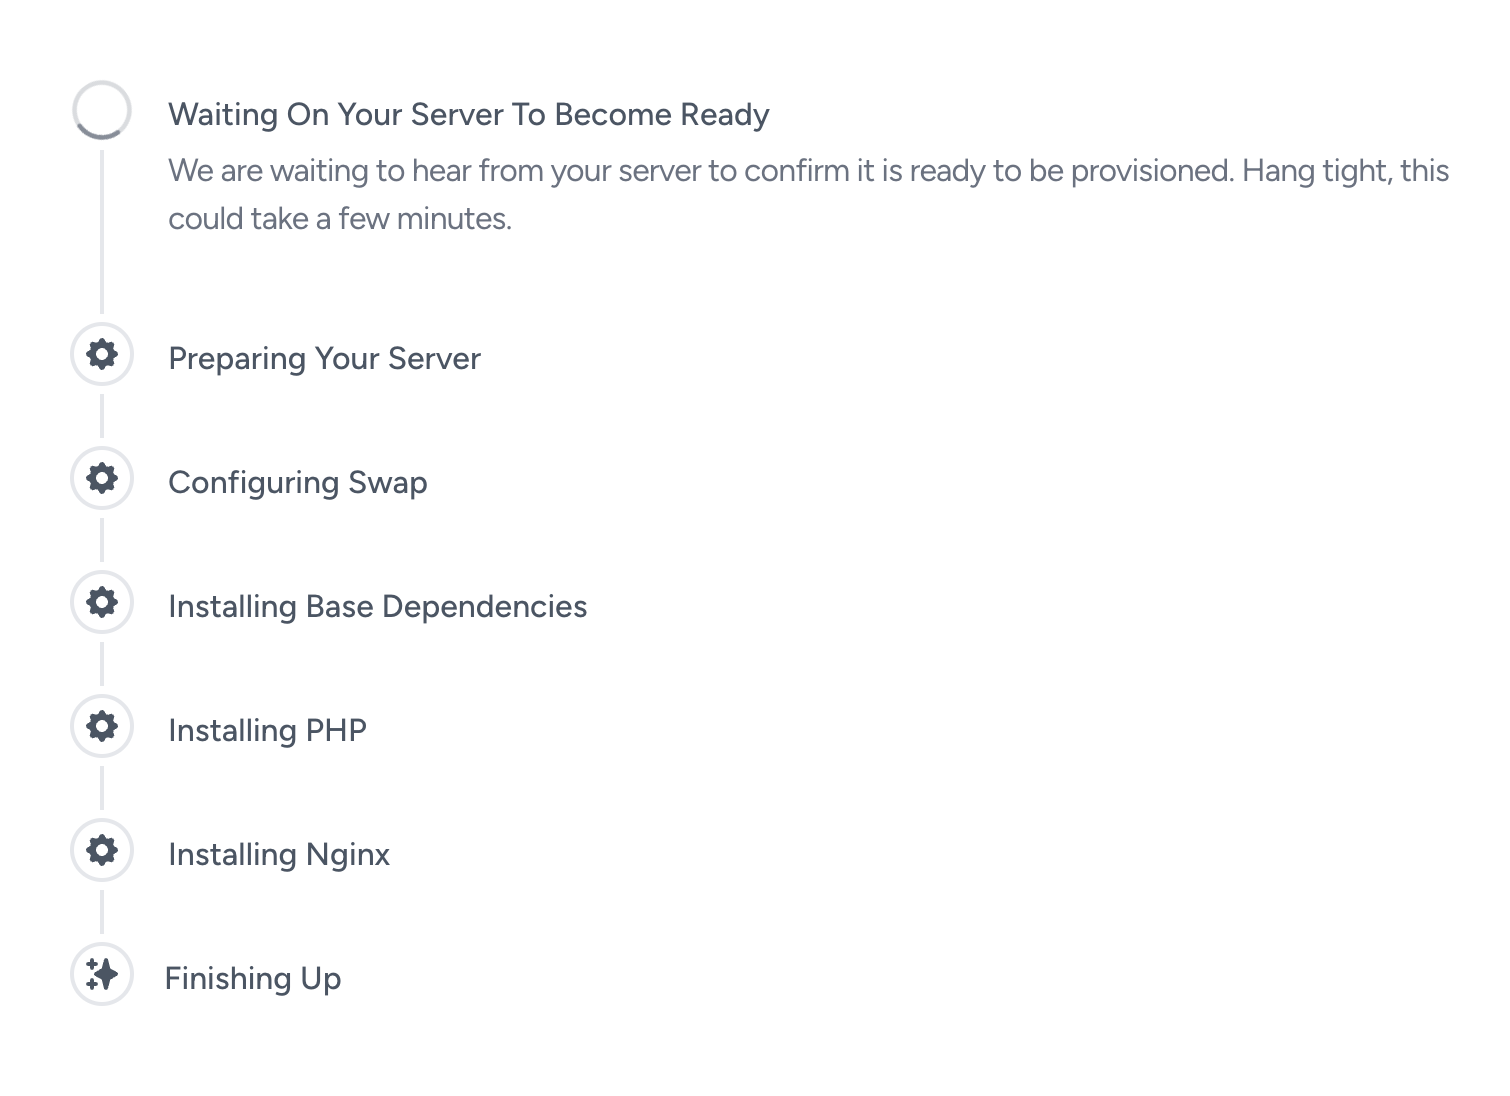
Once the process is finished, the next thing is to connect Laravel Forge with Envoyer to have zero-downtime deployments!
Connecting Laravel Forge with Envoyer
I'm going to assume you already have an Envoyer account ready to be connected with Laravel Forge. If not, please go to Envoyer's website and set up a new account.
Go to the Laravel Forge Account Settings page to link Laravel Forge with Envoyer.
Then, go to the new server settings page and select “Sites” on the sidebar. Notice there is a default site already created. We are not going to use that one, instead, we are going to create a new site for our app.
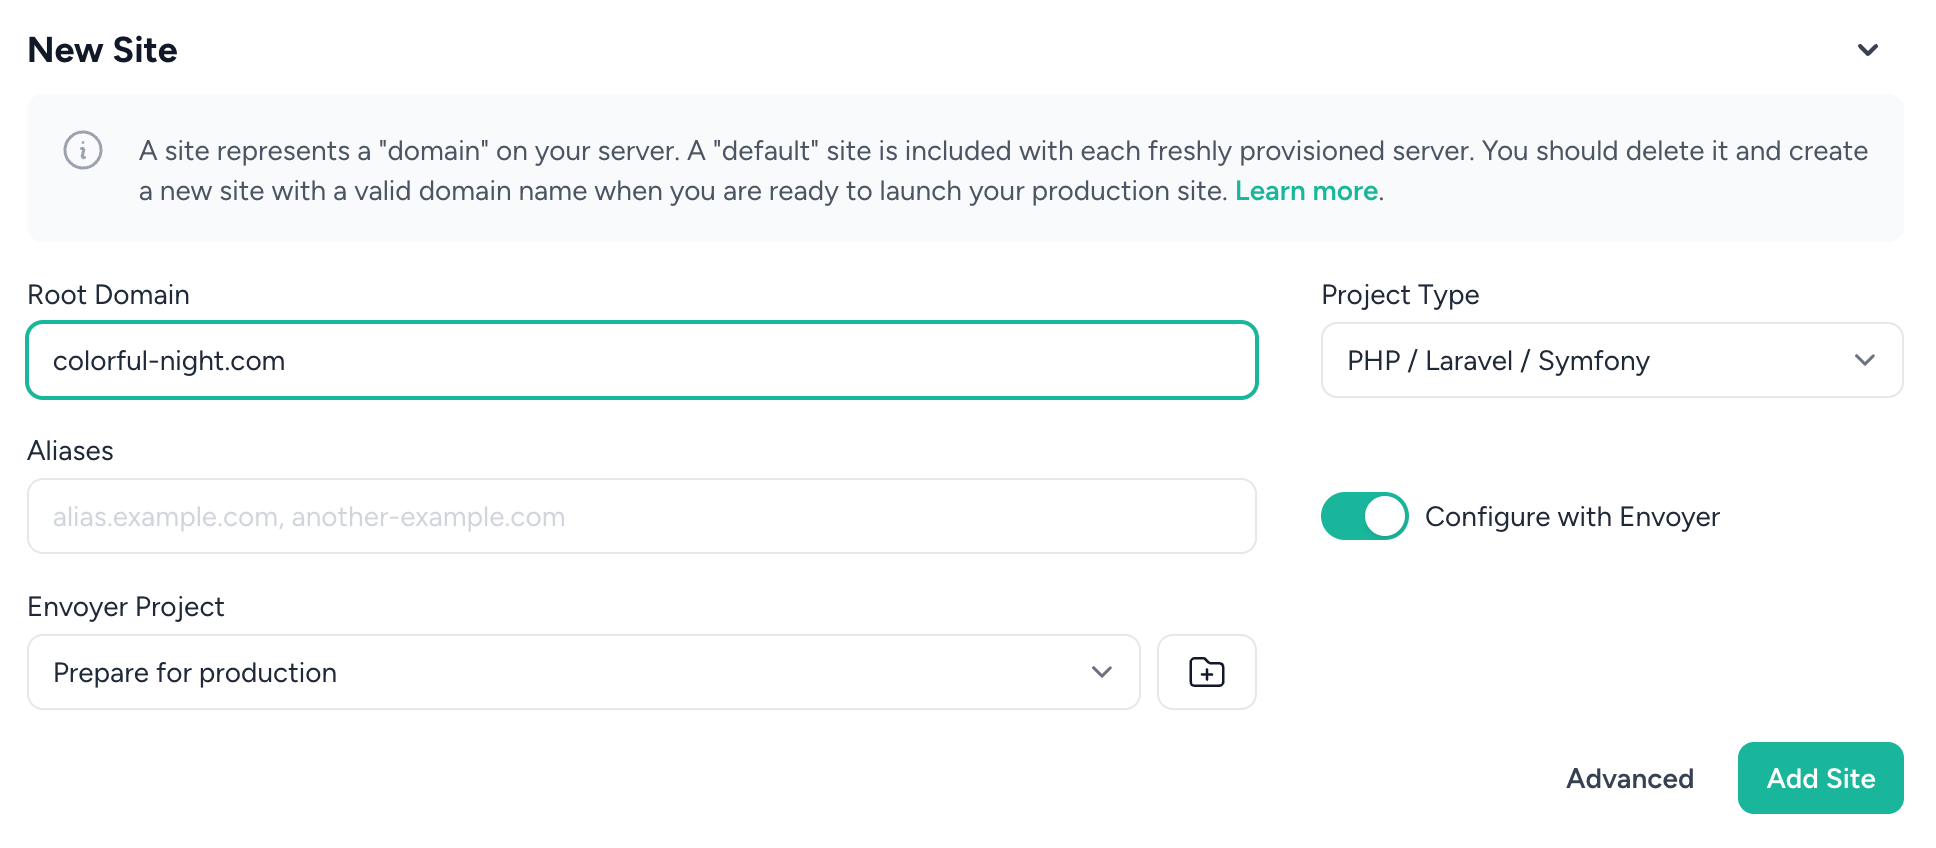
Select Configure with Envoyer, and now you can see a new field where you can select the Envoyer project.
Because this is a new project, go click on the directory 📁 icon to create a new project on Envoyer.
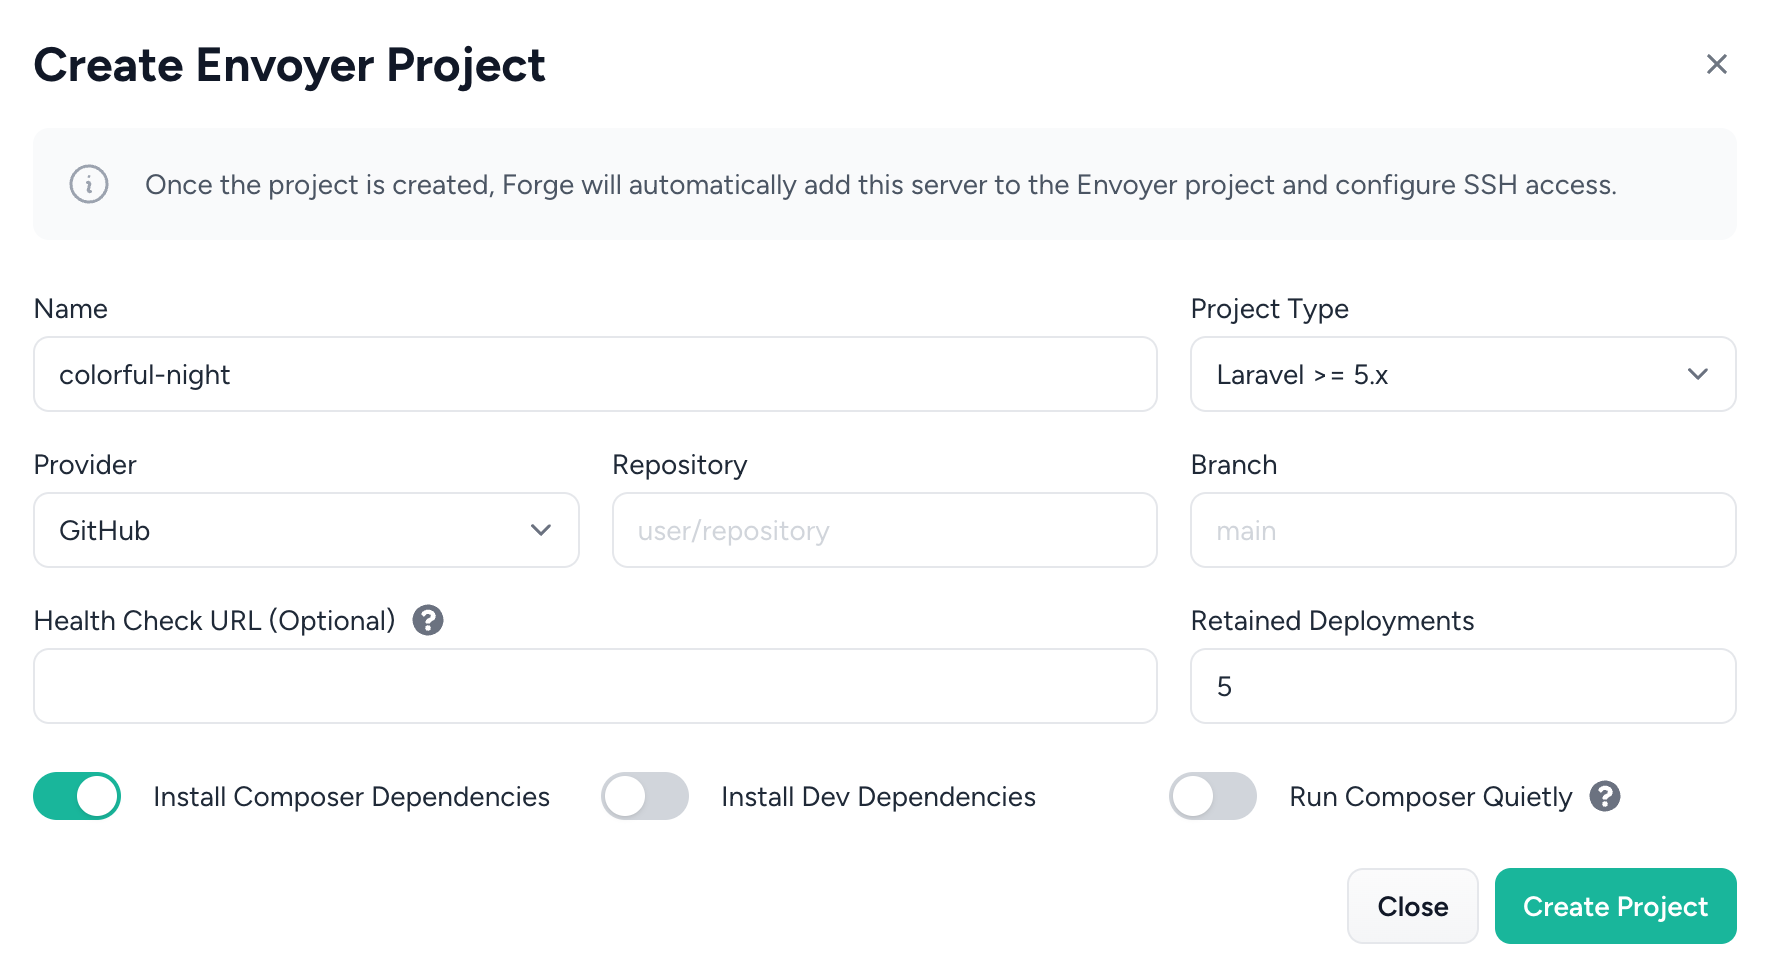
In this form:
- Define a name for your project on Envoyer.
- Define the Git repository and branch.
- You can define a health check URL that Envoyer can ping after a deployment.
- Define how many retained deployments you want to have. This is useful when, for any reason, you need to roll back to a previous deployment.
- You can define if you want to automatically install composer dependencies, install dev dependencies, and run composer quietly, which just means that Composer is not going to print any output.
Click on "Create Project" button, and select the new created project. Finally, click "Add Site" button.
You can also delete default site as we are not using it.
We have created our first site with Laravel Forge and Envoyer! But this doesn't end here. We still need to deploy our application.
If you added a health check URL on the Envoyer project settings, it's a good idea that you create a new record on your domain provider that points to the server's IP.
You can also set up SSL directly from Laravel Forge! Check the docs for more information.
Managing Environment
The next things is to set up our .env file. We do this on Envover project's settings page. Go to the project's dashboard and select the Servers tab. You should be able to see your server on the list.
Click on "Manage Environments" button and you'll see the next popup window:
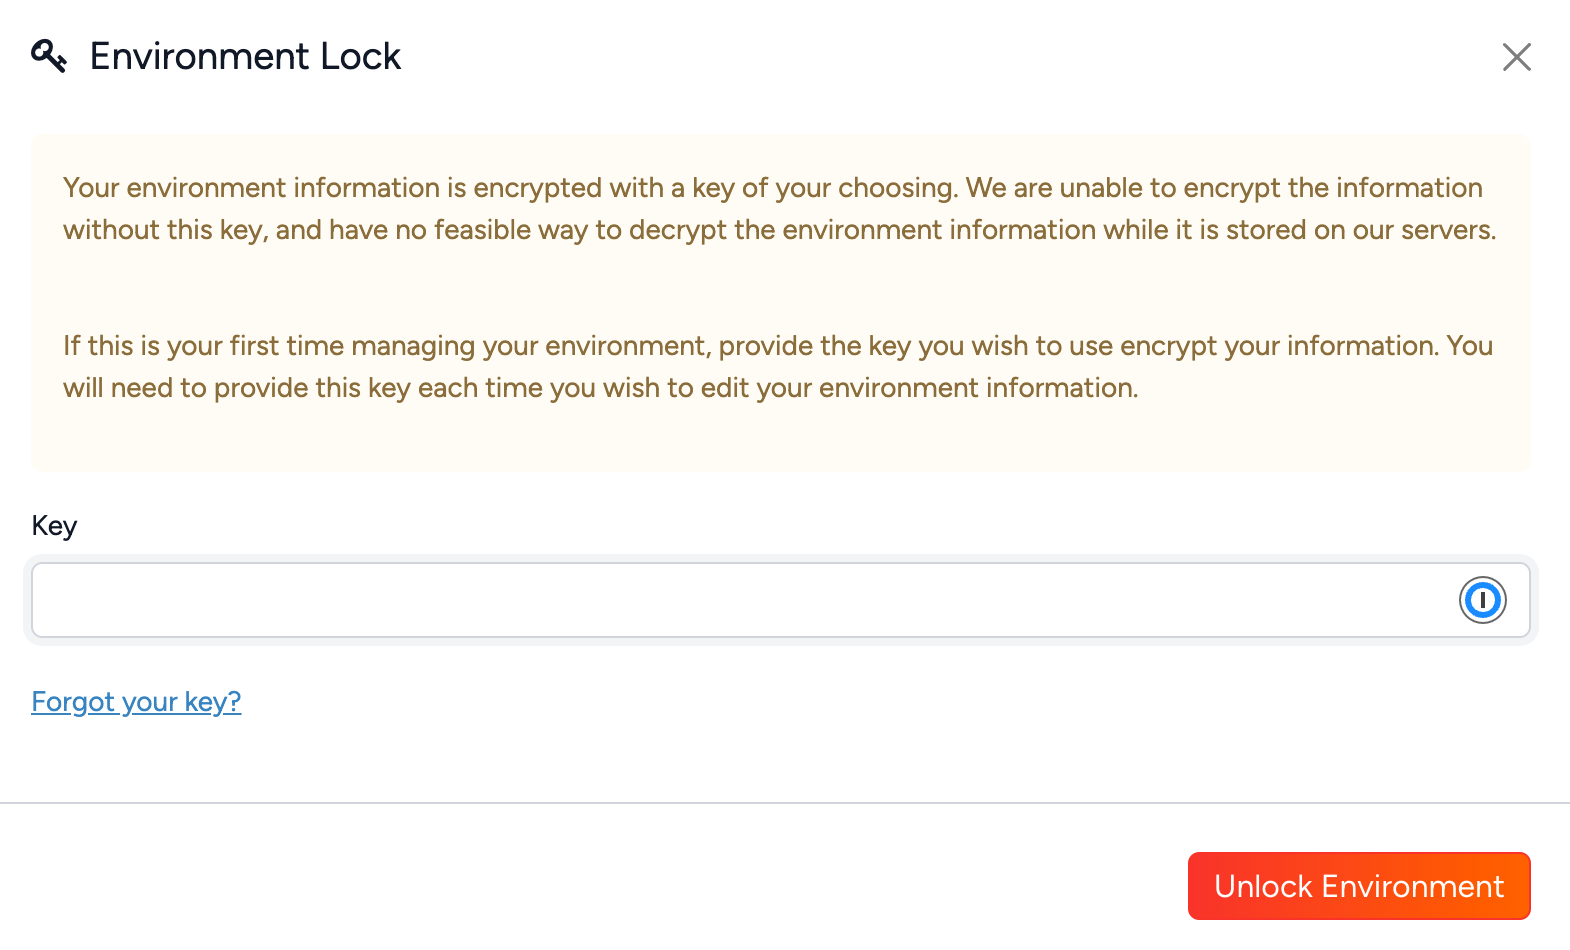
Envoyer stores an encrypted version of .env file. So, we need a key to encrypt and decrypt the file. The first time you enter this page, you need to provide a new key to encrypt the .env data, and from now on you'll need that key to decrypt the data every time you want to access it.
Provide your key and click on "Unlock Environment" button. Then, add your .env file content and save.
Deployment Hooks
Now click on "Deployment Hooks" tab. Here is where you define the steps you want to set up when doing a deployment. You can define steps to run your DB migrations, build the frontend, etc.
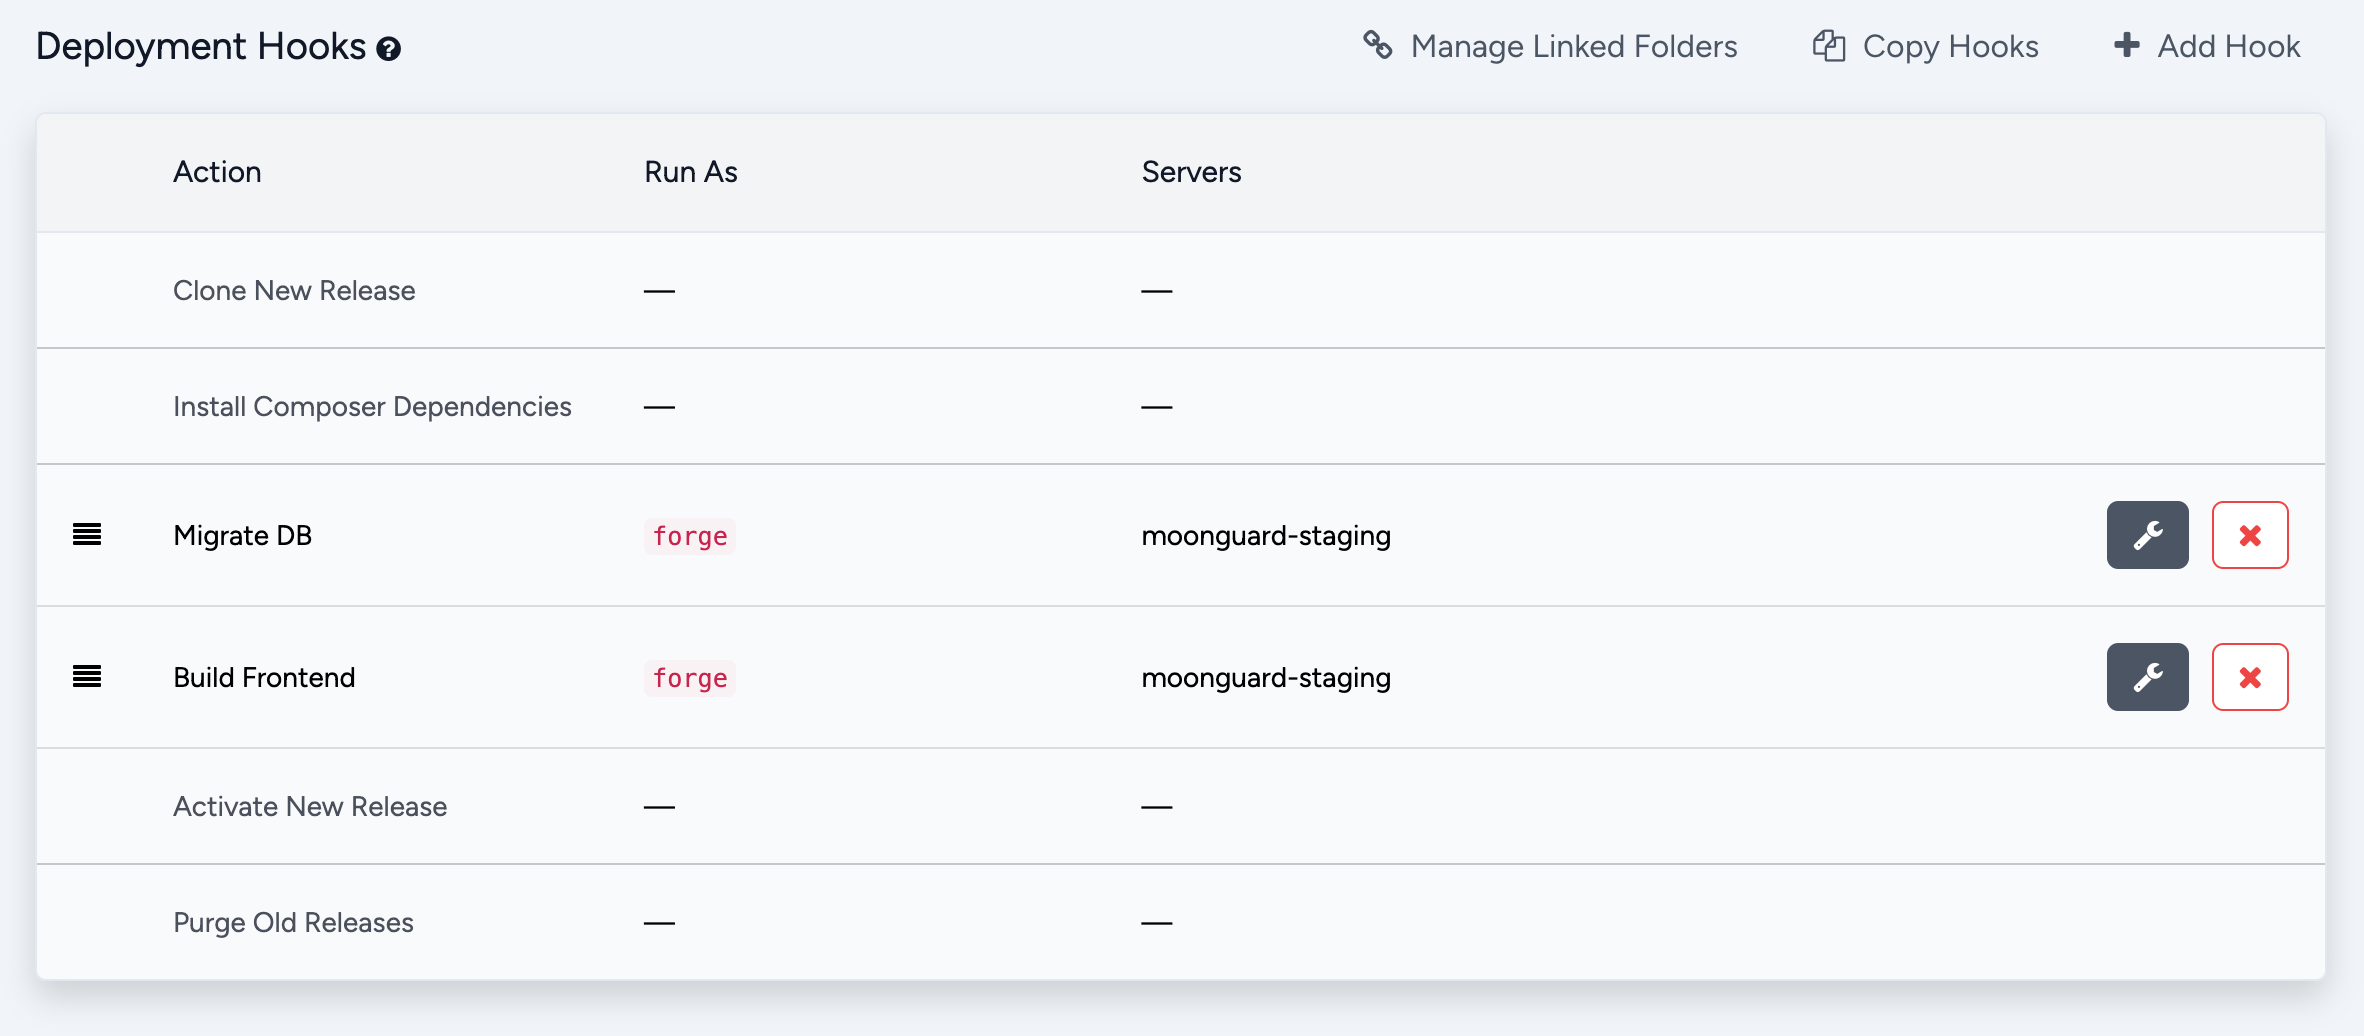
You can also drag the steps to follow the order you want. Here is an example of a hook.
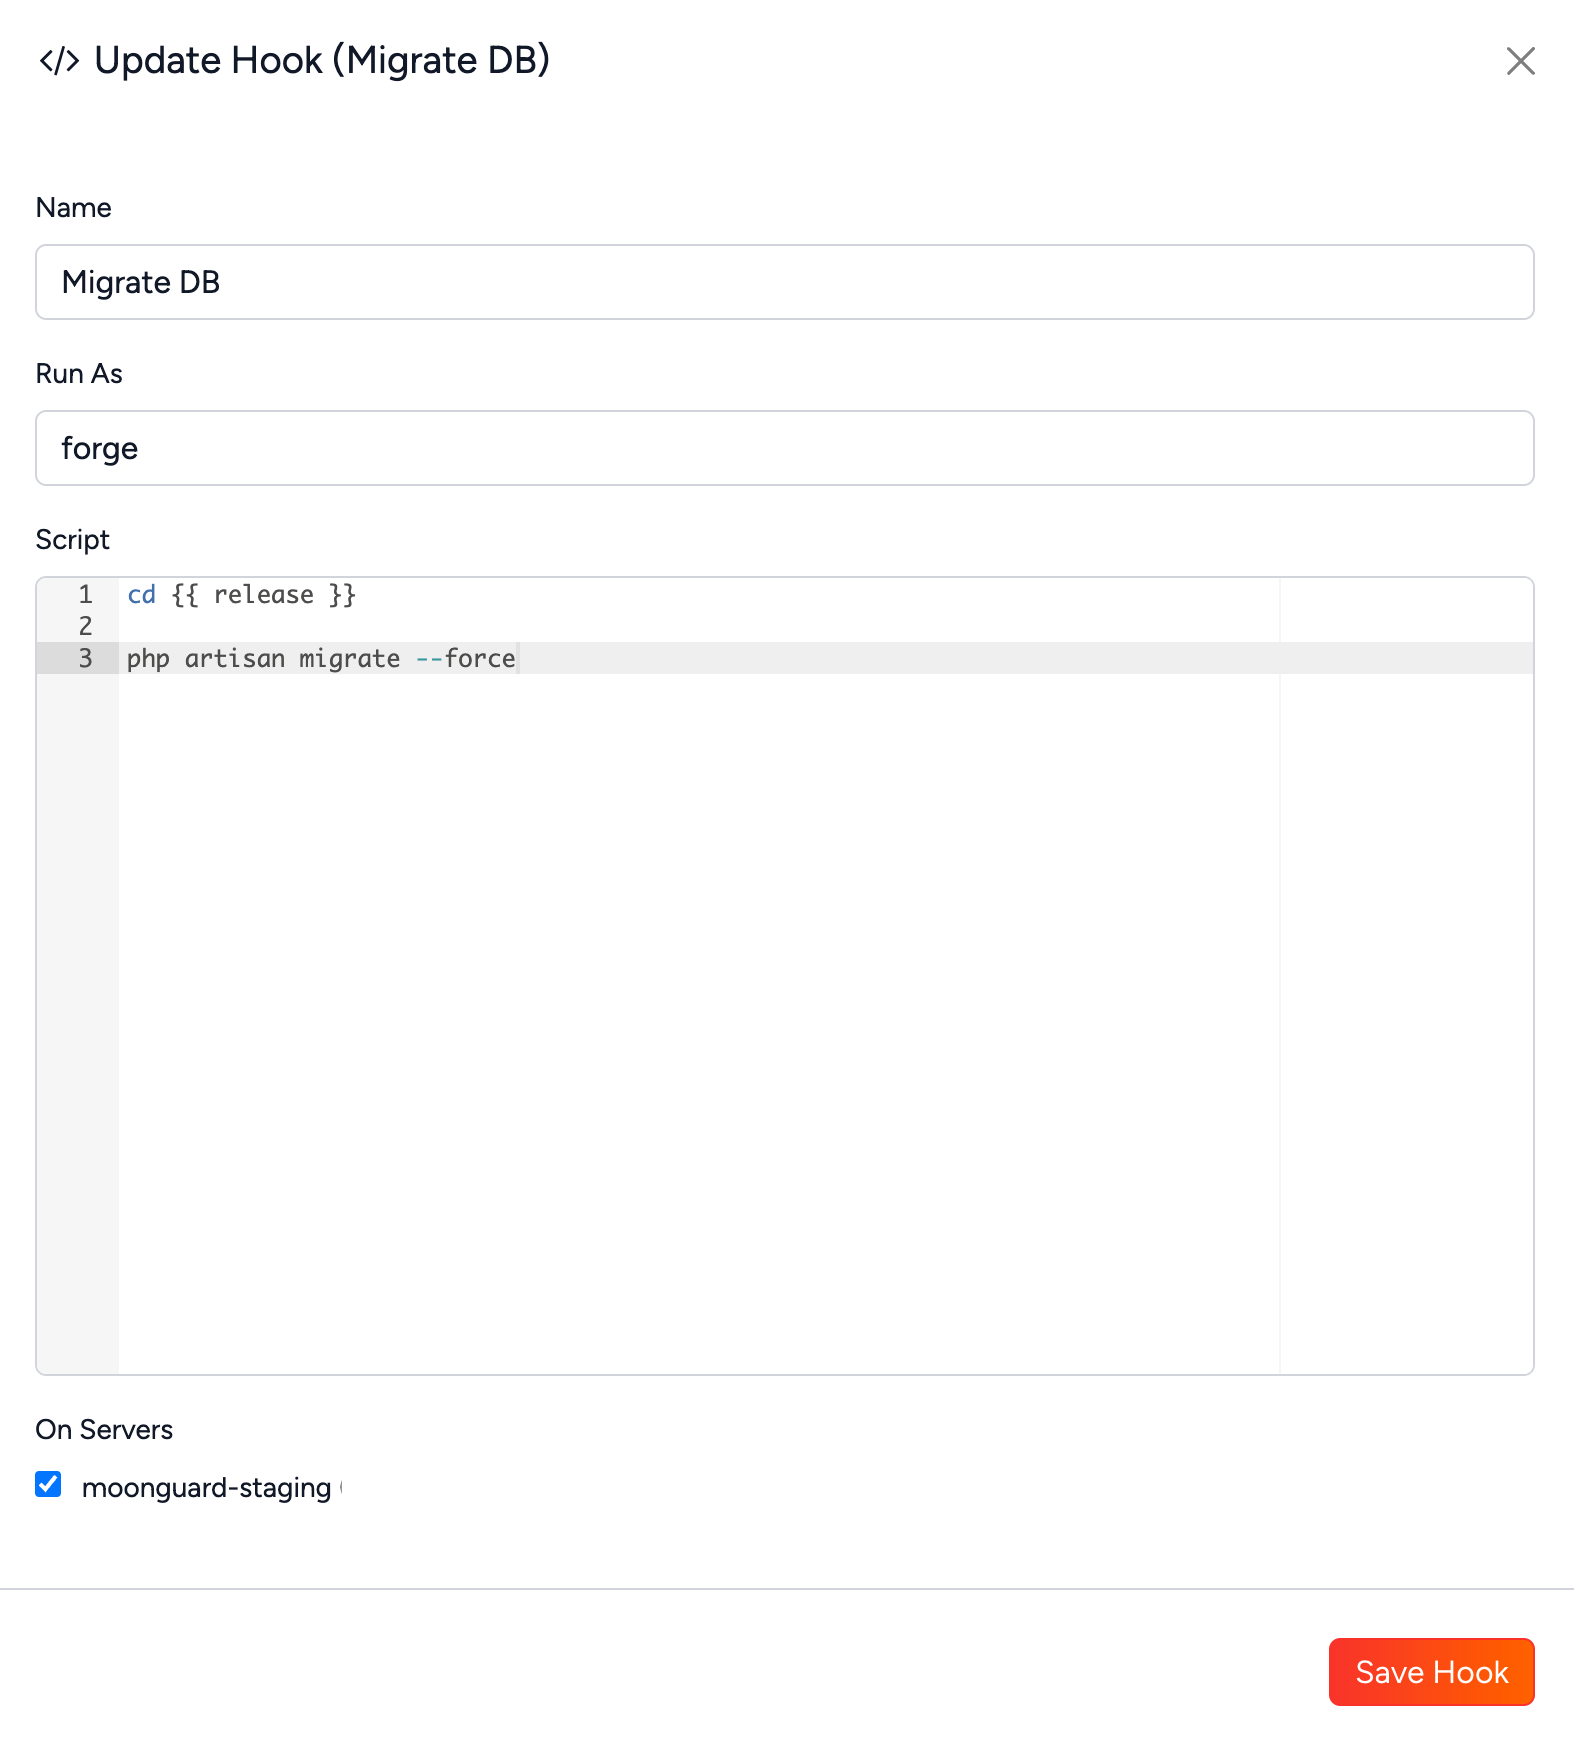
Notice thecd {{ release }}, this is because Envoyer creates a new directory for every release, so you have to make sure the command runs in the right folder.
Be sure to select your server on “On Servers” section before saving the hook.
With all these configurations in place, you're ready to deploy your Laravel application. Click the "Deploy" button in Envoyer to initiate the deployment process.
It's possible you have to try multiple times before you get to deploy your application, but once there, you are done setting up the server!
In upcoming articles, I'm going to show you how to set up a DB, cache, file storage, and email service on your application.
Happy deploying!
